How and Why You Should Flush Your Water Heater Annually
Admin • November 7, 2017
Most homeowners don't think twice about their water heaters, but the reality is that these appliances require maintenance on a periodic basis. Without regular attention, a water heater is subject to a short life span and will needlessly cost a homeowner for early replacement.
Worse, a broken water heater can leak and cause extensive damage, or it can burst and cause scalding injuries. That is why it is important to take time to drain and flush your hot water heater annually. Below is how you can perform this necessary maintenance procedure and keep your water heater working.
Why Your Water Heater Needs Flushing
Even though you can't see it, tap water contains some amount of dissolved minerals, including iron, calcium and a variety of other substances. As water is heated inside the tank, the dissolved minerals precipitate out of the water and form a sediment inside the water heater.
Over time, these sediments accumulate at the bottom of the tank and create a layer that insulates the heating element or flames from the water. This prevents the water from heating to an optimal level, but the worst harm is done when the metal tank absorbs the brunt of the heat. Ultimately, overheating will weaken the metal and cause damage that can't be repaired.
Drain the tank once per year to help maximize the life span of the tank and prevent this sediment from building.
What You Need to Do
Fortunately, draining your tank is less difficult than you may think.
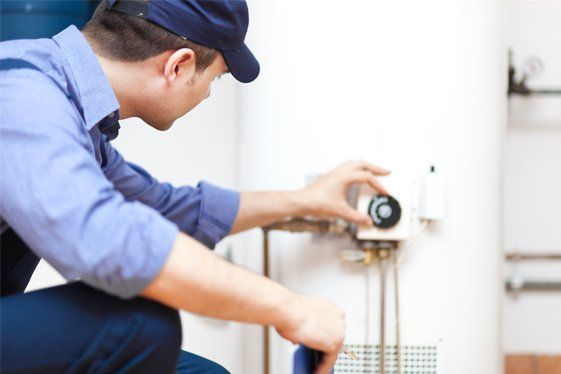
1. Turn Off the Water Heater
The first step to flush your hot water heater is to turn off the heat source inside the tank. A water heater uses a thermostat mounted on the front of the unit. Turn the dial on the thermometer to off.
2. Disconnect Electrical Power or Gas
Once the thermostat is turned off, disconnect the electrical power or gas supply to prevent accidents. The power to electric water heaters will probably need to be switched off at the breaker panel, but gas water heaters use valves adjacent to the units.
3. Turn Off the Water Supply
Next, locate the cold water supply valve leading to the tank. Many cold water valves are equipped with a blue handle or other blue markings for easy identification. Most types of values require you to turn the valve in a clockwise direction or across the water line to close it.
4. Drain the Hot Water from the Tank
After turning off the water supply, allow the water heater to cool down for at least an hour before proceeding. Once it has cooled, attach a garden hose to the drain fitting on the bottom of the water heater. Be careful when attaching the hose to prevent twisting the fitting.
5. Open the Drain Fitting
When you have attached the garden hose, place the free end of the hose into a five-gallon bucket and slowly open the drain valve. Monitor the water entering the bucket to ensure the liquid flows freely.
Keep an eye on the sediment level inside the container. Once the bucket becomes full, shut off the drain valve and empty the bucket in a convenient location. Continue filling the bucket until the tank is completely drained.
6. Flush the Tank
After draining the tank, turn on the cold water valve at the top of the water heater. This will force fresh water into the tank and flush out any remaining sediment. Continue flushing until there is no additional sediment leaving the tank.
7. Restore the Tank to Operation
After finishing the flushing process, turn off the drain valve, remove the water hose and restore water and power to the water heater. Turn the thermostat back to the 'on' position as indicated by the manufacturer's directions.
If you have questions about your water heater or need a replacement, be sure to contact Express Electrical Services
for help. Our experts can repair or replace water heaters and will provide you with friendly, affordable service.
Does your home fuse box need an upgrade? Read this blog to learn about six signs that indicate it’s time for an upgrade to protect your electrical system.
In this detailed article, we'll take a detailed look at some signs that your kitchen needs rewiring. Continue reading to find out more.
What types of electrical upgrades do you need to make before you list your home for sale? Take a look at the top electrical upgrades to consider.
There are several ways to protect your water mains and keep them in good condition. Discover three simple things you can start doing today.
Improving your office space is a great way to improve the workspace. Learn five critical services electricians offer during office remodeling projects.
A slab leak can cause more than just water damage to your home, especially in the summer. Read about the dangers of a slab leak by reviewing this blog.
As a property owner, you have certain responsibilities for the plumbing of your rental property. Learn professional tips by reading this blog.
Many homeowners have been bombarded with conflicting advice and outdated myths about plumbing. But no longer! Read our blog to learn about a few myths.
A major plumbing issue that constitutes an emergency is a water main break. Read this blog to learn about a main break’s causes, effects, and solutions.
You may be competent at fixing many home plumbing problems, but some issues require a professional hand. Here are 7 signs that indicate such a need.